
When you are using paint or Sumi ink, have you ever looked at your water bucket or cleaning pot and seen those beautiful swirl patterns, thinking that if only I could capture those swirls of color on my paper?
Not going to lie, I’ve always had these kinds of ideas too!
Perhaps people in the past had the same idea as we did, wanting to preserve the patterns floating on the water, which led to the birth of "Suminagashi (墨流し)", a traditional Japanese paper marbling technique that is commonly used for decorating the Washi paper.
Since the Heian period (794-1185), Suminagashi has also been used for writing papers.
Suminagashi is a technique for copying concentric circles of patterns on Washi paper by dipping the tip of Sumi ink or dye in the water and repeatedly dropping turpentine oil on the floating colored areas.
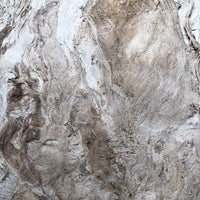
Marbling technique, on the other hand, is said to have developed from Sumi-nagashi. The technique later spread to Europe, where it is applied to stationaries such as letter paperand the edges of books.
It is also called "marbled paper" because the pattern resembles marble.

Marbled paper (IL PAPIRO/ Florence, Italy)
For this article, I will try to create a marbling myself and the following art materials and tools I used are all available in PIGMENT TOKYO.
【Art Materials and Tools】
・Pigment paste
・Raw Kozogami (Mulberry Washi paper without Dosa sizing)
・Alginate liquid
・Dishwashing detergent (small amount)
・Water
・Brushes (a few, for several colors and dish detergent)
・Ceramic plates or palettes (a few, for several colors and dish detergent)
・A large tray (the larger than the size of the paper, the better)
・A bowl or bucket (for brush cleaning)
・Towel
【Things that are useful to have: 】
・Bamboo skewers, forks, etc.
・Fans
■ How to Marble Paper
① Get your items together, such as the pigment paste of your favorite color, dishwashing detergent, and water.
Then put them on a plate or palette.
・Pigment paste
First, put a few drops of pigment paste in a palette.
For hardened pigment pastes, remember to knead them with a painting knife beforehand to make them easier to use.
・Dishwashing detergent (100ml of water : 1~2 drops of detergent)
The use of dishwashing detergent is for its ability to repel water, so if you add too much of the detergent, it might repel the color and make it difficult to create beautiful patterns.
I chose some pink-ish and yellowish pigment pastes to match the color of spring.
Since the final result will be slightly lighter than the original color, it is better to first try it without diluting the colors with white paint or water.


No doubt that you don’t have to use the same colors as me, remember, marbling is all about creativity and having fun!
②Fill your tray with water and alginate liquid.
A larger flat tray or container makes it easier to create beautiful ripples.
Depending on the size of the tray and paper, about 5 cm height of water will be fine.
Add some alginate liquid into the water and stir it.
The amount of alginate should be enough to make the water slightly thick.
(As a good rule of thumb is 4/5 water : 1 alginate liquid.)
Please note that if there is too little alginate liquid, the pigment paste or colors may sink, however, if there’s too much, it will be hard to create patterns from the surface of the water.
The weight of the pigment paste varies depending on the color, so adjust the amount of alginate liquid according to your needs.

③Apply the colors and detergent on the brushes.
Apply the pigment paste and dishwashing detergent on different brushes.
Then, put some water on the tip of the bristle and dissolve the pigment paste with the water, and apply the color liberally.
Make sure the brush is also fully covered with the dishwashing detergent.
Please note that dipping your brush (that is made of animal hair or fur) in detergent will damage it. I highly recommend you to use a nylon brush or brush with thinner bristles.
Moreover, a brush with a good bristle that can hold the paint will be able to apply the colors better!


④Marble your paper!
Now it's time to create ripples with colors.
Dip the tips of the brushes (that are covered with pigment paste and detergent) alternately into the water.
The dishwashing detergent will instantly repel the colors off and create a ring on the water, but if you take the brush off the water too quickly, it may not take on the color properly.
Furthermore, the pattern of the marbling can be changing easily and fast, so make sure to create a sheet of marble paperall at once.
Tips: It is easier to work if you prepare all the colors you need in advance.
The more layers of “color rings” you put on top of each other, the more profound the pattern will be.

⑤Creating patterns
The shape of the color rings might change during the process, but no worries, this kind of randomness creates more of a unique design.
Use a fork or bamboo skewer to push the colors around the water in a pattern, or you can use a fan to blow the water surface to create ripples too.

As you can see from the above picture, color rings are layered on top of the water surface, and I create these patterns with a bamboo skewer.
For those who think that the color rings are beautiful enough without any further designs, you may skip the step⑤ and proceed directly from step④ to ⑥.
⑥Transfer your designs to the paper.
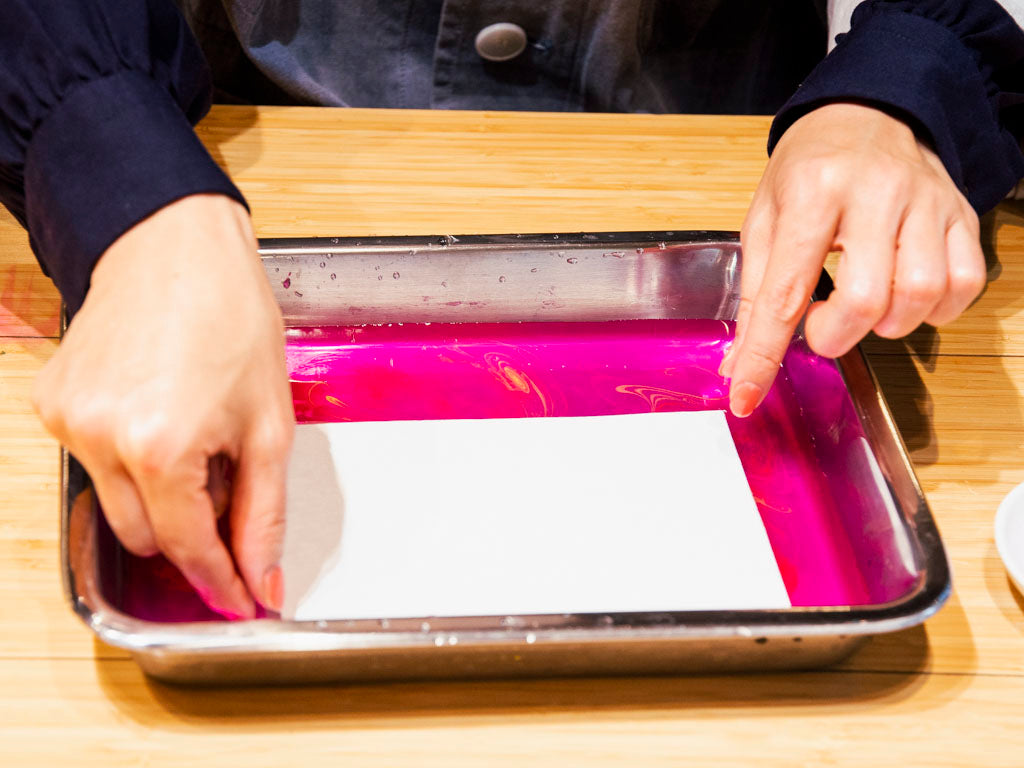
The water will soak the paper instantly, so once the patterns are successfully transferred on the paper, lift the edge with your fingers, bamboo skewer, or tweezers and carefully roll the paper back off the water.
This time, I used the raw 20 momme* Kozogami (Washi paper) for my marbling, which is resistant to water and does not have any water repellency. The paper is thin and weak, so it is easy to tear apart. If you are using Kozogami, I’d recommend 10 momme or more/
*momme: the counting unit that indicates the weight/thickness of Washi paper. (per momme = 3.75g)

⑦Et voilà,you’re done!

Place your marbled paper on a flat surface to dry.
The vivid colors of the pigment paste fuse with the soft ripples of the water to create a beautiful swirl of color. You can also create different designs by changing the color materials.
Furthermore, feel free to keep designing your marbled paper by applying metal leaf or your own drawings!
If you'd like to see us demonstrate in person, you can click on the link below for the IGTV on PIGMENT TOKYO’s Instagram! We used Saiboku AYA (color ink stick) instead of pigment paste in the demonstration.
【Instagram IGTV】SUMINAGASHI/墨流し https://www.instagram.com/tv/CLEF2Tlig7-/
Therefore, with these art materials and simple steps, you can now “capture” the design of ripples on a clean sheet of paper!
Hope you enjoy this technique, which has been handed down years and decades ago, at home.

References
・Washi Paper Industrial Cooperative of Fukui Prefecture (viewed on February 14, 2021) https://www.washi.jp/yougu/suminagashi/
・IL PAPIRO (viewed on February 14, 2021) ilpapirofirenze.eu
Editor & Writer
Natsuko Shiraishi
Graduated from the Textile Design at Tama Art University. She is an artist who mainly works with original Washi paper and calligraphy.
Favorite matière: Paper, dynamic moves of wood fiber
Graduated from the Textile Design at Tama Art University. She is an artist who mainly works with original Washi paper and calligraphy.
Favorite matière: Paper, dynamic moves of wood fiber