
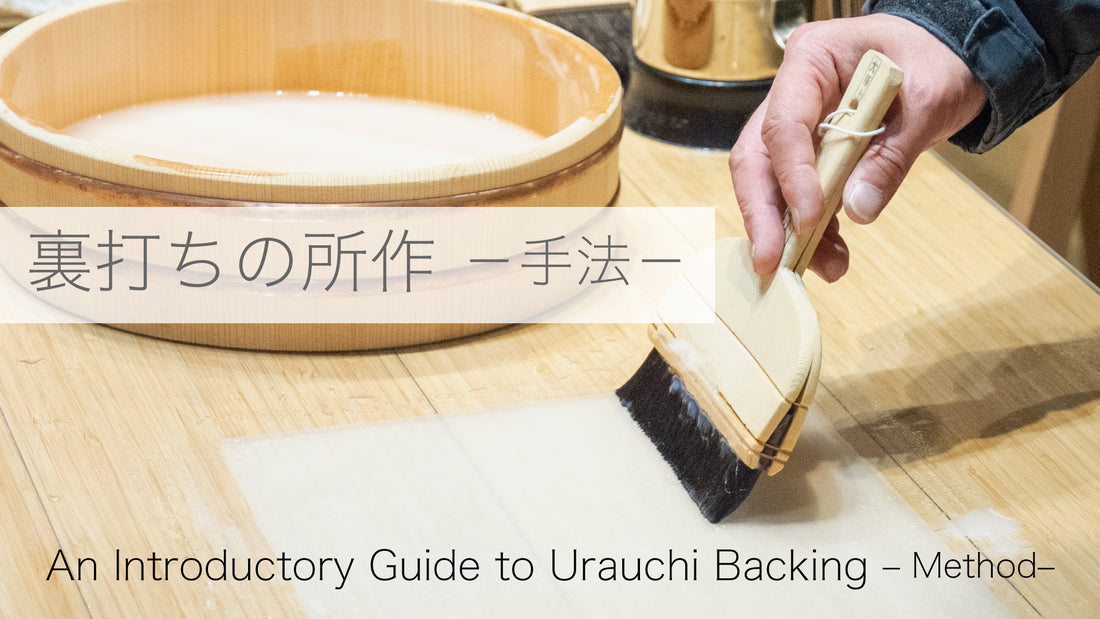
While making art, some of you may have a situation in which you want to or need to apply Urauchi / backing to your art pieces.
Carry on with the previous article, "An Introductory Guide to Urauchi Backing -Overview-,” a representative of Monobe Gasendo and a professional Hyogu-shi, Yasunori Monobe is going to teach us the basic techniques of Urauchi backing.
Basic Urauchi Backing Processes
The Japanese mounting technique is called "Nage-Uchi ". Washi paper and silk require different procedures for mounting Urauchi paper to them, so I will explain by following each step.
When you work on Urauchi, covering a table with a waterproof acrylic mat is recommended.
Uneven surfaces or materials that easily adhere to paper may make it difficult to peel off or may cause damage to the artwork.
【Mounting Urauchi Paper】
◾️Washi Paper
① Preparation for an Artwork
The artwork will be cropped after mounting the Urauchi paper on its backside, so it needs to have margins around it. If it did not have margins or was made by the actual size of the final art piece, accurate skills will be required for the process.
Therefore, for artworks that require Urauchi, you need to select the size of the Washi paper and the method by considering the cropping afterward.
② Applying Water to the Artwork
To moisten the backside of the Washi paper with water, place a sheet of paper underneath the flipped Washi paper and wet the entire surface with a Mizubake (water brush) or a mist sprayer.
Washi paper’s excellent stretchability allows it to stretch when it is wet and shrink when it is dry.
When wetting and drying the Washi paper and the Urauchi paper are glued together, they will both be stretched and shrunk while all the wrinkles and looseness will be removed, resulting in a perfectly smooth and flat result.
The paper used underneath does not have to be Washi paper, it can also be pulp paper or printing paper.
However, please try to avoid using printed or colored papers because the color will be transferred to the artwork as the ink or dye dissolves when the paper gets wet.
Apply water on the entire back surface of the art piece with a Mizubake.
Wet the brush and shake it several times to remove the water.
Since the fiber of the backside of the Washi paper gets fuzzy easily, giving pressure with the brush may cause damage to it, therefore, please gently stroke the brush as if you were touching the surface.
Moreover, working on larger pieces needs to be fast and accurate, otherwise, it starts drying.
For thick Washi paper, it does not absorb water easily, so you need to moisturize it sufficiently. On the other hand, although thin paper absorbs water quickly, too much water does not help stretch the wrinkles out because the Washi paper and underlay paper stick together.

・When Using a Mist Sprayer
Fill the mist sprayer with water and spray it generously and evenly over the entire back side of the Washi paper.
Please avoid using a usual sprayer but a pressure sprayer that can produce fine mists, as the large drops of water cannot moisten the art piece evenly.
This time, we would like to apply Urauchi to this drawing piece which was created with Sumi ink and animal glue on a calligraphy mat.
I had stored this artwork without care, so it is wavy and has wrinkles and creases after air-drying.
Let's see how this work will turn out after Urauchi.

The above image is after moisturizing the backside of the drawing with the Mizubake and the mist sprayer.
If we leave it like this, the wrinkles and creases will remain.

When Sumi ink and animal glue are used on an art piece like this, the hardness of the paper where it has drawing and white space is different, and that makes a difference in absorbance as well. Thus, we can wet the drawing part first to make it softer.
If we want to work on specific areas, this is the time when the Mizubake comes in handy.
Also, if some areas start drying, we can wet them again with either the mist sprayer or the Mizubake. Remember, the art piece needs to be moist all the time.
We use the same process for the artworks painted by mineral pigments mixed with animal glue or gum arabic because these materials also have different absorbances.
However, artworks painted with watered-down Sumi ink or using unsized raw Washi paper may cause bleeding when water is applied. In this case, using a mist sprayer is recommended.
③ Stretching Out Wrinkles
We use a Nazebake (Smoothing Brush) to remove wrinkles from the Washi paper.
Since the paper is still wrinkled after applying water, it should be stretched out nicely with a Nazabake.
If there are dry areas, water them with a Mizubake or mist sprayer.
We use a Nazebake made of Tsugu (a type of palm plant).

Tsugu Nazebake (Smomthening Brush)

Brush gently from the center outward to push out wrinkles little by little as if pushing out air. If we try to do it with one brush stroke, it may cause creases or damage to the paper.
In particular, when artworks are painted without mounting on support with water, creases are likely to appear on the outlines of the Sumi ink, which are especially noticeable on thin Washi paper. You also want to watch out for the direction of moving the Nazebake and smooth it out carefully.
If some areas start drying, moisten the entire surface of the paper as needed.
Thick Washi paper can handle brush strokes more, so we do not have to work on it little by little.

The image above is a stretched drawing using Nazebake.Now wrinkles and creases are barely noticeable.
When you want to paint with mineral pigments that create an uneven surface of the paint, you can apply those after the Urauchi process.
◾️Washi Paper
For applying glue on Urauchi paper, you need to prepare a Noribake (paste brush), light glue, and Urauchi paper.
・Noribake (Paste Brush)
We need to apply light glue thinly and evenly, so using a brush with the proper bristle length and can hold the right amount of glue is essential.

Noribake (Paste Brush)
・Glue
We dilute cooked Shofunori (starch glue) or store-bought Shojinori (glue for mounting Washi paper on sliding doors) that do not contain adhesive ingredients.
・Urauchi Paper
Prepare Hadaura paper* or thin Kozo (mulberry) paper which is about three momme. (Momme is a traditional measurement that refers to the thickness of Washi paper, about 3.75g per momme)
Kozo paper can be either sized or unsized.
*Hadaura paper is the first layer of paper applied to the painting, it’s a thin Kozo paper made specifically for Urauchi.
Urauchi paper should be one size larger than artwork to make it easier for the later processes.
Kozo paper is suitable for Urauchi because it has long, thin, strong, and flexible fibers, and it’s strong against the water too.
Among Washi papers, Mitsumata paper and Torinoko paper are shiny and beautiful but are stiff and easily creased, moreover, Gampi paper has clumps, therefore, they are not suitable for use as Urauchi paper.
Another thing, the Washi paper may tear when wet and lifted if it’s too thin (less than two momme). If this is your first time doing Urauchi, it’s better to choose a piece of Washi paper about three momme that has moderate thickness and flexibility.
 Urauchi paper before spreading glue evenly (Edge: glue not soaked through paper yet / Near the center: glue pool can be seen)
《1. Applying Glue on the Front Surface of the Urauchi Paper》
When applying glue on the surface of the Urauchi paper, take plenty of glue with Noribake and spread by moving the brush from top to bottom and then from left to right. Please note that it can cause wrinkles if you spread the glue out at once.
You may find some parts of the paper have a thicker layer of glue or not enough at this moment.
Like the photo below, the brush needs to be held with your index and middle finger, and supported with your thumb on the handle. This way, you can rotate the brush smoothly with one hand and that makes it easier to work.
Instead of brushing it back and forth, you want to move the brush in the same direction such as painting from top to bottom and left to right without making a gap. If you can flip the brush each time, the glue will be applied evenly.
Moreover, using Noribake helps to spread the glue thinly and evenly, the nice application of the glue is essential for succeeding with Urauchi.

《2. Removing Uneven and Thickened Areas of Glue》
To fix the uneven and thickly painted areas, you can remove the excess glue on the brush by using the bottom of the basin and then moving the brush straight and parallel to the paper.
Too much glue will cause rot and too little will cause the Urauchi paper to come off the artwork.
⑤Urauchi
Urauchi on the Artwork.

《1. Lifting the Urauchi Paper》
To pick up the Urauchi paper which has glue on it, we use a stick because the wet thin paper is difficult to pick up with our hands.
Please use a thin and long wood or a bamboo stick which is longer than the shorter side of the Urauchi paper. You can use a wooden or bamboo ruler too.
As shown in the above photo, place the side edge of the stick on a point about the same width as the stick from the shorter side of the paper.
Pinch up the edge of the Urauchi paper slightly with your finger.
Place it on the stick and lift it while holding the Urauchi paper and the stick with your left thumb and index finger.
Once lifted, pinch the front corner with your right hand so that the glue-applied side of the Urauchi paper faces down.
(*The dominant hand is indicated as the "right hand" according to the hand movement in the image. If your dominant hand is the left hand, please see it as the opposite.)
This technique is only applicable by using Kozo paper that has long and water-resistant fibers.
For instance, Senshi paper which has shorter fibers and is easily torn by water cannot be lifted while it has glue on it. If we need to use that kind of paper, we use a technique called Jigoku-uchi.
When we do Jigoku-uchi, we place an artwork facing down on a board and apply Urauchi paper directly to it with glue.

《2. Applying it to the Artwork》
When applying Urauchi paper to the artwork, remember to face the artwork down. Then, place the glued side of Urauchi paper to it from the corner of the opposite side of the wood stick.
Double-check if the artwork is facing down or not because gluing the front side of the artwork is a common mistake for beginners, so keep reminding yourself until you get used to the technique.
If there are no margins around your artwork or the Urauchi paper is just the size of your artwork, it is necessary to measure precisely for setting the Urauchi paper, which makes the process slightly more difficult.
Therefore, if this is your first time, working with the artwork and Urauchi paper having extra margins is recommended.

Urauchi paper is pasted on the reverse side of the artwork. (Before flattening, you can see there are air bubbles appearing between the two pieces of paper.)
Place the Urauchi paper gently to prevent air from entering as much as possible and when the paper is laid down completely, remove the wood stick.

Smoothing out the surface (Brush: Kyo-type Tsugu Nazebake)
Adhere the Urauchi paper to the artwork using a Nazebake.
Lay down the Tsugu Nazebake and use the tip of the brush to stroke the surface of the paper to release air bubbles.
For larger works, smoothing the Urauchi paper with the brush at the same time as placing it on the artwork for preventing wrinkles. Wet Urauchi paper is delicate and tends to get fuzzy on the back side, so it is important to work carefully and without rushing yourself.
There is no substitute for the Tsugu Nazebake and it is an essential tool for the Urauchi method.
Tsugu (a type of sugar palm), which is used for the tip of the Nadezebake, is a very suitable material for Urauchi because of its softness and strong water repellency.
◾️Kenpon (Silk)
Kenpon is a Japanese word that means painting and calligraphy works drawn on silk fabric.
Because it is made of animal fiber spun from silkworm cocoons, it is sensitive to water and friction, and when wet and dried, it shrinks and forms crepe-like wrinkles. Hence, it is necessary to wet the Kenpon work with water and shrink it beforehand.
In addition, the fiber shrinkage rate is higher than paper, so if the Urauchi is applied in the same way as for Washi paper, the paint will peel off from the silk.
① Preparation of an Artwork
When creating a Kenpon painting, it is necessary to make it one size larger than the final size because it will be cropped later the same as the Washi paper.
Also, we have to be aware that the silk will be shrunk in the next step by moisturizing it.
② Applying Water to the Artwork
This process needs to be done a day or more before the Urauchi process.
Place a sheet of paper under the artwork and face the painted side down. Then, wet the entire work thoroughly with a Mizubake or a mist sprayer.
Leave the artwork on a blanket or fabric for a day and night to dry and shrink the silk.
When using a Mizubake, rather than brushing too hard, move the brush gently from the center to the edges. Please note that the paint might bleed or the brush might slightly wash the paint off during this process. If you are concerned, use a sprayer instead of a Mizubake.
Whether you use a Mizubake or a mist prayer, the overall usage of tools and methods are the same as for Washi paper. However, larger pieces require the same process two or three times until the silk fully shrinks.

Moisturizing silk by using a mist sprayer
③ Applying Glue
For applying glue on the Urauchi paper, prepare a Noribake, hard-type glue, and a piece of Urauchi paper.
・Noribake
Using a brush with a shorter bristle is better for hard-type glue.

Tsukemawashi Bake (Thin Paste Brush)
・Glue
Use Tsukemawashi-bake (Thin Paste Brush) for preparing well-kneaded hard glue made of cooked starch glue or store-bought Shoji glue that does not contain chemical adhesive ingredients.
・Urauchi Paper
Please prepare Hadaura paper or thin Kozo paper about one size larger than the artwork.
For applying Urauchi on silk, thin Urauchi paper (less than 3 momme) is also acceptable since the silk fabric will grab the paper. For beginners or people who are not used to working with wet paper, using Urauchi paper with a thickness of about 3 monme is recommended.
《1. Applying Glue on the Front Surface of the Urauchi Paper》
Basically, the process is the same as for the Washi paper. Please refer to the section "Washi paper ④ Applying Glue".
However, do not brush too hard even though the glue is hard. It may cause the Urauchi paper to become fuzzy or tear.
《2. Removing Uneven and Thickened Areas of Glue》To fix the uneven and thickly painted glue, take plenty of glue with the Tsukemawashi-bake and spread it evenly to avoid pooling.
④Steaming Silk and Mounting Urauchi Paper
When silk is dry, the Urauchi process will not go well. Therefore, we will use a piece of Urauchi paper to give moisture to it.

《1. Steaming Silk》
For steaming the silk painting, place the unglued side of the Urauchi paper on it.
If the art piece is small, cover it with wet Urauchi paper. In the meantime, we can wipe the board and prepare for the next step.
For a larger piece, use a mist sprayer to moisten it a little. Remember, the silk will shrink if you spray too much water on it.

《2. Mounting Urauchi Paper on Silk Painting》
After a few minutes, turn the Urauchi paper over to face the glued side down and apply it to the silk painting.
While laying down the Urauchi paper, it is best to use a Nagebake.
The difference from Washi paper is the unevenness of the weave. If it is difficult to remove air bubbles or wrinkles with a Nazebake brush, you can make fine adjustments by lifting the Urauchi paper.
After placing the Urauchi paper, please brush the surface of the Urauchi paper with the Nazebake to adhere it to the silk so that the following process will be easier to work.
Also, how to lift the Urauchi paper up is described in "Washi Paper ⑤ Urauchi."
⑤Urauchi (Strong Bonding)
The Urauchi of the silk is done by beating with a Uchibake (Pounding/Pressing Brush).
While beating the silk and Urauchi paper together with it, the fibers of the Urauchi paper are entangled in the weave of the silk.
If the silk is dried from step ④ without going through this process, it will shrink, and crepe-like wrinkles will appear on it, which will then cause peeling off from the Urauchi paper.
 Uchibake (Pounding/Presshing Brush)
Uchibake is made of Tsugu (sugar palm) or Shuro (fan palm) plants. This type of brush is only used for Urauchi of fabrics such as silk and is a must-have item as well.
Since this brush is thick and heavy, it does not require much strength to adhere a Urauchi paper to a piece of fabric.
Moreover, the silk painting will become smooth and flexible by gluing them tightly, and even if it is rolled up in a hanging scroll, the tightness will prevent the silk and Urauchi paper from peeling off or bending.

How to Hold a Uchibake
《1. Holding the Uchibake and Checking the Moisture of the Tip of the Brush》
Hold the Uchibake to check its moisture.
Instead of holding the handle, grip the semicircular part between your thumb and the rest of the fingers.
By holding it in this way, pressure is applied through the entire bristles.
If the brush is dry, moisten the tip with a bit of water by using your hand. We need to make sure that it is not dried, otherwise, it will damage the Urauchi paper and the artwork.

《2. Beating with Uchibake for Adhering the Silk and the Urauchi Paper. 》
Tap the Urauchi paper and silk gently with the Uchibake to adhere them.
The Uchibake needs to hit the paper vertically from a position about one fist high instead of striking down from high, starting from the edges without any gaps. If the brush is applied down diagonally on the Urauchi paper, it will be damaged and not adhered well.

The trick is to use the weight of the Uchibake.
Tap the brush by keeping the same speed and pressure while advancing little by little with the width of the brush.
《3. Smoothing the Surface of Urauchi Paper》
After beating with a Ucahibake, the fibers of the Urauchi paper are now fuzzy.
Use a Nazebake to smooth out the fibers and make the perfect surface. If you miss the process this time, it will be complicated to fix it later.
The processes after this step are the same for Washi paper and silk.
【Temporary Gluing to Finishing】(same processes for both Washi paper and silk)
Finally, the last part of the Urauchi process is temporarily gluing the lined artwork on a specific board.
Temporary gluing, called Karibari in Japanese, is for flattening and drying the lined artwork.
We are using a board for Karibari, a piece of scrap paper, and a Nazebake.
・A Bord for Karibari
A board used for temporarily attaching the lined artwork in the Urauchi process is built by constructing a grid with white parts of cedar wood and applying layers of Kozo paper which has strong fiber on the front and back of the wood structure and then applying several layers of persimmon tannin to the surface.
Persimmon tannin is a natural dye that has water-repellent characteristics when applied in layers and allowed to dry. It has long been used for processing paper, textiles, and building materials because of its unique characteristics. Coating paper with persimmon tannin produces a moderately smooth surface, which makes it easier to peel off paper and fabric with less remaining paper and glue.
However, making the board for Karibari takes time and energy and is usually built in a Urauchi studio by artisans, so it is generally difficult to obtain.Therefore, what you can use as an alternative is a smooth wood board or panel, such as plywood which is coated with cashew paint and dried.
Cashew paint is a synthetic paint made from the extract of cashew nut shells. Cashew nuts, which belong to the poison oak family, contain ingredients similar to lacquer and have properties similar to persimmon tannin.
When using a wood board, a thickness of 10 cm to 15 cm is desirable because thin ones can easily distort. How large the board can be decided due to the size of your artwork and mobility.
Although plain wood (uncoated board) and acrylic board are commonly available materials in stores, plain wood absorbs moisture well and adheres to paper too much, on the other hand, plastic materials such as acrylic board are too slippery so the artwork would fall off before drying.
・Inserting a Piece of Paper
Inserting a piece of paper will help later when removing the artwork from the board.
We recommend cutting excess Urauchi paper into strips.
① Karibari, Temporarily Gluing
Temporarily gluing the lined artwork on the board.
《1. Inserting A Piece of Paper》
Apply glue to the four corners of the Urauchi paper to prevent the glue from sticking to the artwork, and spread an appropriate amount of glue to the edges of the margin area.

Attaching a lined silk painting on the board temporarily.
《2. Karibari - Attaching Temporarily on a Board》
To glue the lined artwork on the board, lift the corners of the Urauchi paper with your fingers and attach the Urauchi paper side to the board.
Use the Nazebake to smooth out the edges of the Urauchi paper (the area where glue has been applied) and adhere it to the board.
If the underlay paper is stuck to the main piece, peel it off after gluing.

《3. Inserting Air》
Put air between the lined artwork and the board.
Gently pinch the inserted paper and lift it up a little to blow air into it.Blowing air between the paper and the board will prevent sticking to each other, and the artwork will be flattened when it is dried.
You may put the paper anywhere you want but it is better to place it where it is easy for air to flow into the entire space when you blow into it.
② Drying
Let the glued paper dry.

Allow the work to dry indoors and in a quiet place to dry naturally.
Please note that rapid drying by exposing direct sunlight or strong winds may cause deterioration, damage or insufficient finish of the artwork.
③ Removing the Artwork from the Board
After drying, insert a bamboo spatula into the gap where the piece of paper is attached. In the following picture, a painting knife is used.
A knife with a sharp edge, such as a cutter knife, is likely to damage the paper, so using rounded ones made of plastic, wood or bamboo is better. An L-shaped knife such as a palette knife is recommended over a flat shape, as it is easier to use.
Painting Knife NO.868

Next, peel off the Urauchi paper by running the knife along the board surface.
Peeling off the artwork with the four corners of the paper still attached to the board is recommended so that tension is applied evenly to avoid wrinkles. However, since it depends on the size and material of the artwork, please use a method that is easy to peel off.
④ FinishingCropping the artwork is the final step.Here is the finished look.

《untitled》 Natsuko Shiraishi, in Progress/ Deatil,
Sumi Ink and Animal Glue on Paper
Tension and wrinkles of the paper have been flattened, and the contrast and gradation of the Sumi ink are now more clearly visible than before.
The article below explains more about brushes and glue.
An Introductory Guide to Urauchi Backing -Overview-
The handed-down tools, materials, and techniques are built up by the artisans' experiences.
By learning about the Urauchi process, I think I was able to feel the characteristics of paper and silk.
Monobe Yasunori / 物部 泰典
Traditional Craftsman of "Kyo-Hyogu" designated by the Minister of Economy, Trade and Industry
Representative Director, Monobe Gasendo Co.
Faculty at Kyoto University of Arts
Monobe Gasendo Co.
Monobe Gasendo was established in Kyoto in 1901, and has passed down the traditional techniques to four generations of Hyogu-shi.
Reference
“Encyclopedia of Hyougu” Kyoto Housogu Kyokai (ed.) (Kyo-Hyogu Cooperative Association 2011)
Translated by Atsumi Okano and Nelson Hor Ee Herng
PIGMENT TOKYO Art Materials Experts
Profile
Art Materials Expert at PIGMENT TOKYO
NATSUKO SHIRAISHI
Art Materials Expert at PIGMENT TOKYO Graduated from the Textile Design at Tama Art University. While she works as an art material expert at PIGMENT, she also continues her career as an artist of original paper, Japanese paper and calligraphy.
Art Materials Expert at PIGMENT TOKYO Graduated from the Textile Design at Tama Art University. While she works as an art material expert at PIGMENT, she also continues her career as an artist of original paper, Japanese paper and calligraphy.